Introduction
AirPods are one of the most popular wireless earbuds, known for their seamless integration with Apple devices. Many people think AirPods only work with iPhones and iPads, but they can also be connected to laptops, including both Windows and MacBooks. This guide will explain how to connect airpods to laptop (windows + MAC), step by step, in a simple and easy-to-follow manner.
Why Connect AirPods to a Laptop?
Using AirPods with your laptop enhances the audio experience, whether you are attending online meetings, watching movies, listening to music, or gaming. Wireless connectivity eliminates the hassle of tangled wires, giving you more mobility and convenience.
How to Connect AirPods to a Windows Laptop
Step 1: Enable Bluetooth on Windows
To start, open the Settings app on your Windows laptop by pressing Windows + I you can also open settings manually just click on windows 🪟 key on your keyboard and just simply type settings. I’m using Windows 11 You can follow this same procdure on windows 10.
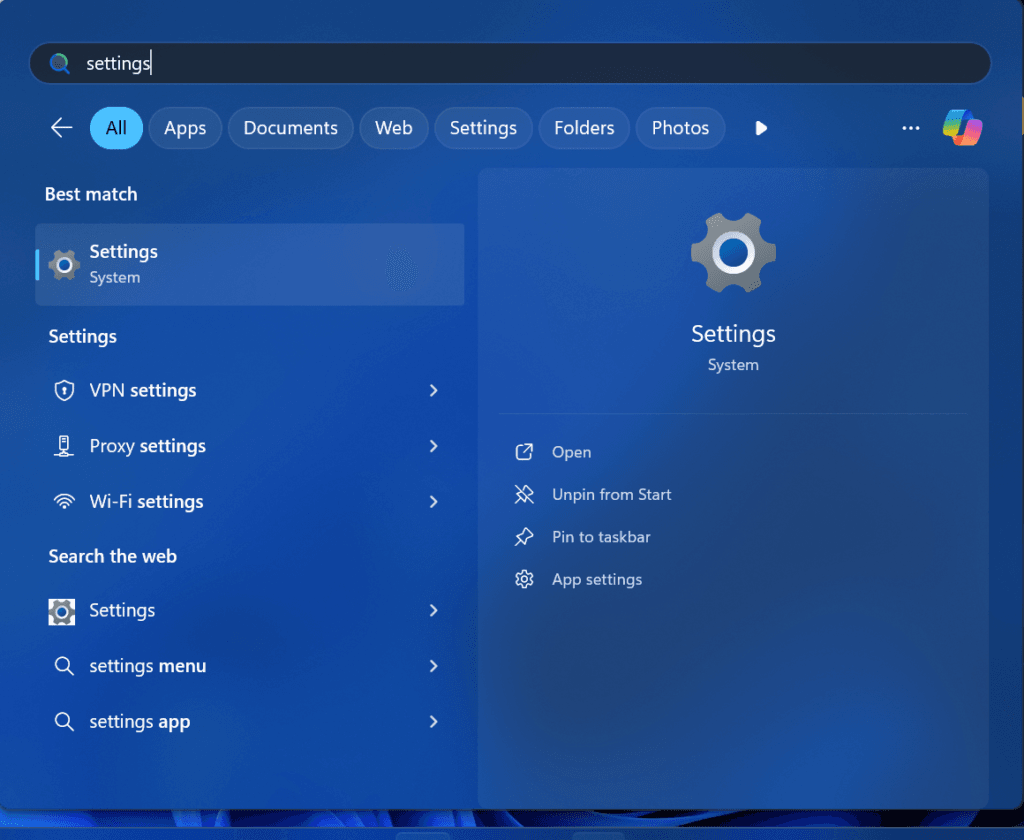
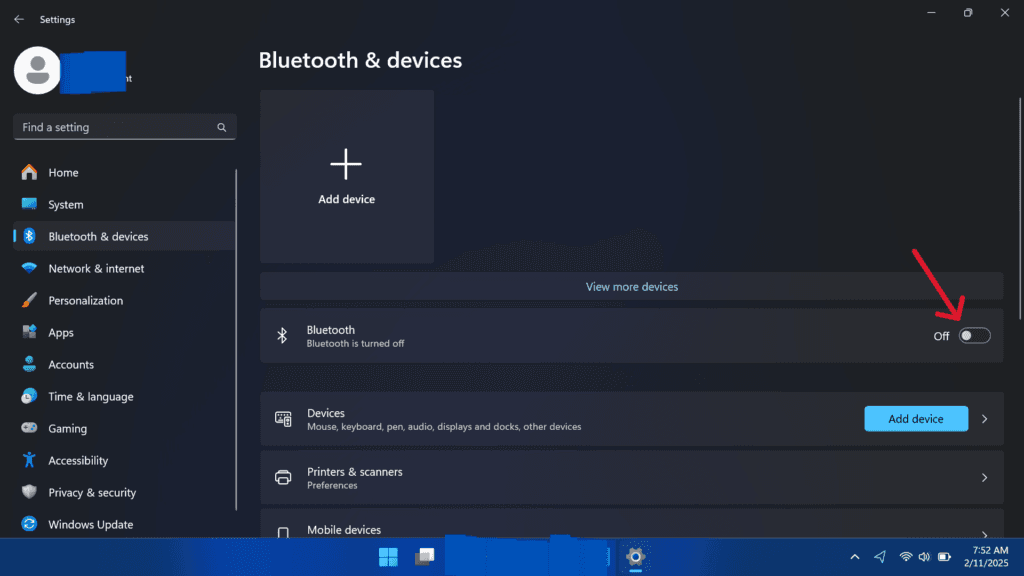
After that Anable Bluetooth.
Step 2: Put AirPods in Pairing Mode
Place your AirPods inside the charging case and keep the lid open. Press and hold the setup button on the back of the case until the LED light on the case starts blinking white. This means the AirPods are now in pairing mode and ready to be discovered by your laptop.

Step 3: Connect AirPods to Windows
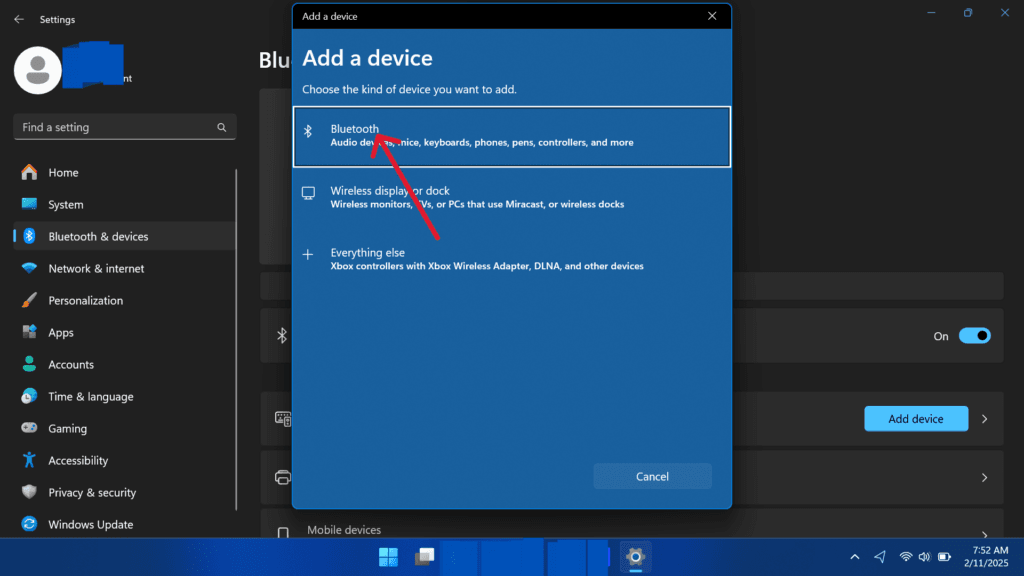
Go back to the Bluetooth settings on your laptop and click on Add device.
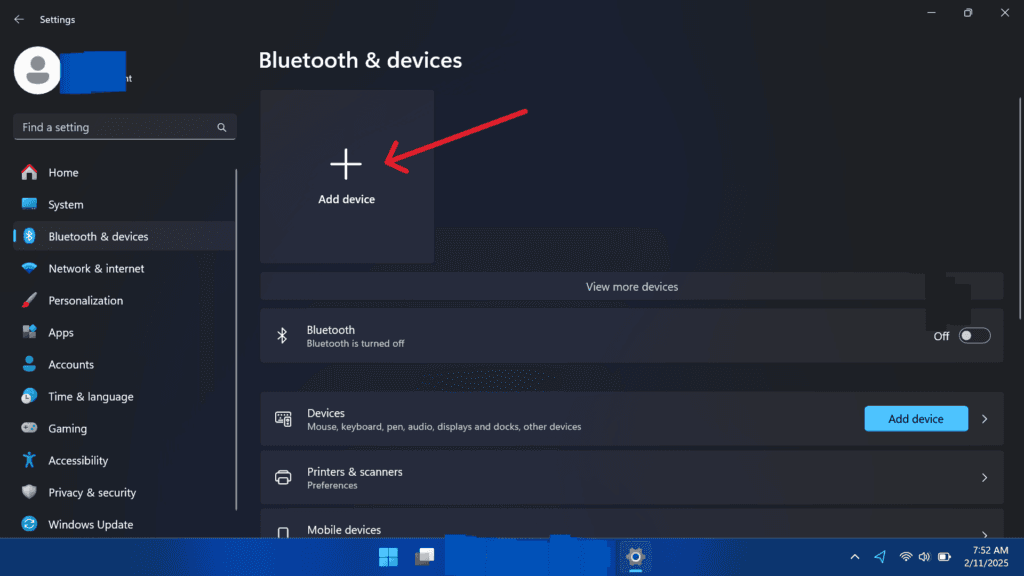
Select Bluetooth from the list of options.
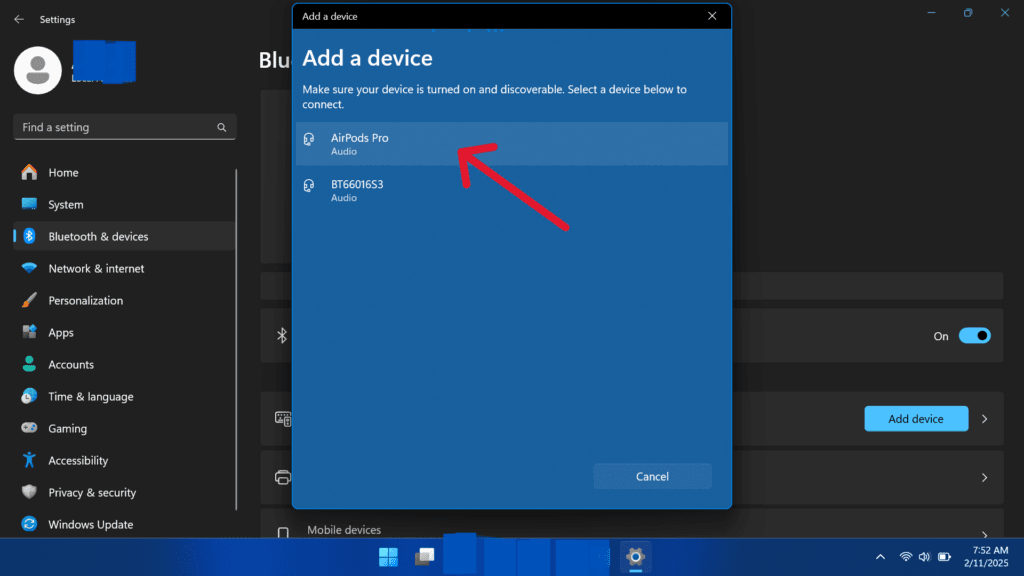
Your AirPods should appear in the list of available devices. Click on them to start the pairing process, and once connected, you will get a confirmation message.
Step 4: Test the Connection
To ensure the AirPods are working correctly, play a song or video. If the audio doesn’t play through your AirPods, open the Sound Settings on your laptop and select AirPods as the default audio output device.
How to Connect AirPods to a MacBook
Step 1: Open Bluetooth Settings on Mac
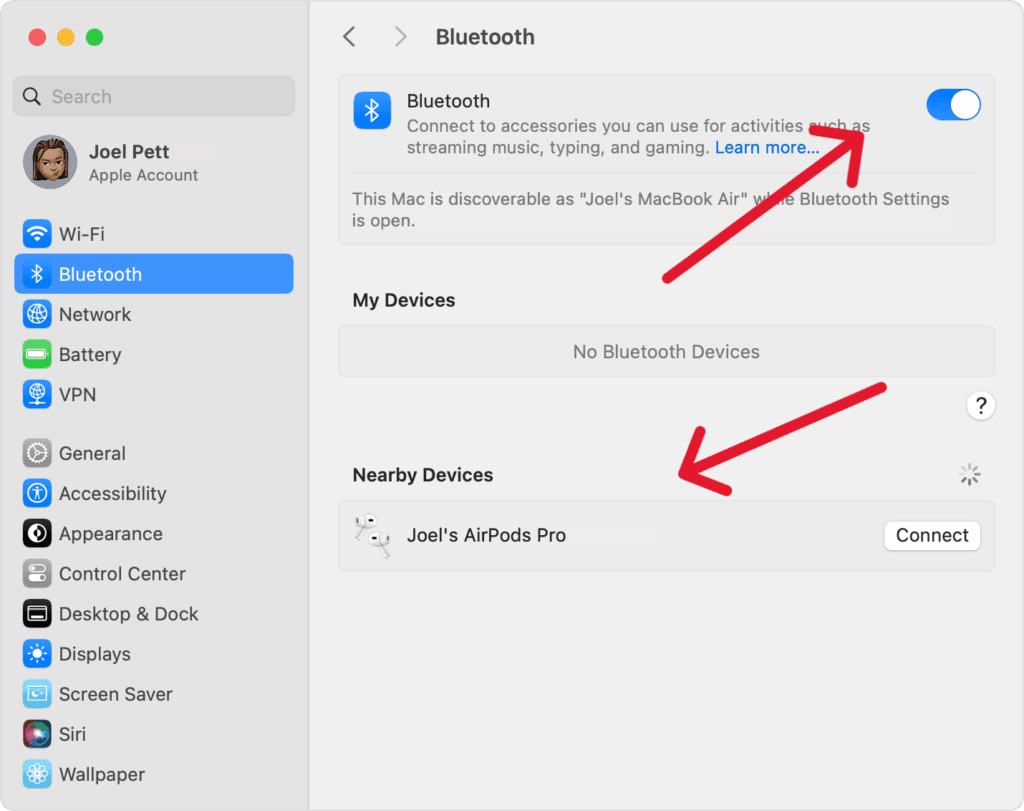
On your Mac, open System Preferences and go to the Bluetooth section. Ensure Bluetooth is turned on so your Mac can find nearby Bluetooth devices.
Step 2: Put AirPods in Pairing Mode
Just like with Windows, place the AirPods in their charging case, keep the lid open, and press the setup button until the LED light blinks white.
Step 3: Connect and Verify Audio Output
Your AirPods should appear in the Bluetooth list on your Mac. Click on Connect to establish the connection. Once connected, test the audio by playing music or watching a video.
Troubleshooting Connection Issues
AirPods Not Showing in Bluetooth List
If your AirPods do not appear in the list of available devices, try turning Bluetooth off and on again. If that doesn’t work, restart your laptop and try connecting again.
Audio Cutting Out or Lagging
If you experience audio lag or frequent disconnections, ensure your AirPods are fully charged and that there are no major Bluetooth interferences. Moving closer to the laptop might also help improve the connection.
AirPods Not Connecting Automatically
AirPods usually connect automatically after the first pairing, but if they don’t, go to Bluetooth settings and manually select them. You can also try forgetting the device and reconnecting from scratch.
Best Features of AirPods When Connected to a Laptop
AirPods provide a high-quality audio experience and include features like noise cancellation and a built-in microphone for clear calls. They also offer seamless switching between Apple devices, making them a great choice for Mac users.
Alternative Wireless Earbuds for Laptops
If you are looking for other wireless earbuds, consider options like the Sony WF-1000XM4 for excellent noise cancellation, Samsung Galaxy Buds 2 for affordability, and Bose QuietComfort Earbuds for superior audio clarity.
Best Free Apps for Managing Bluetooth Devices
There are various apps that help manage Bluetooth connections. Bluetooth Audio Receiver for Windows lets you control audio sources, while AirBattery for Android helps check AirPods battery levels. The Bose Connect app is great for adjusting audio settings.
Conclusion
Now you know how to connect AirPods to a laptop, whether it runs Windows or macOS. Following these steps will ensure a smooth and hassle-free connection. Enjoy your wireless listening experience on your laptop without any complications.
FAQs
1. How to pair AirPods to a laptop?
Follow the steps outlined in this guide to enable Bluetooth on your laptop, put your AirPods in pairing mode, and connect them via the Bluetooth settings.
2. Can you connect AirPods to a laptop?
Yes, AirPods can connect to both Windows and Mac laptops through Bluetooth.
3. How to connect AirPods to a Windows laptop?
Turn on Bluetooth, put AirPods in pairing mode, and select them from the available devices in the Bluetooth settings.
4. How to connect AirPods to an HP laptop?
The process is the same as for other Windows laptops. Enable Bluetooth, put AirPods in pairing mode, and pair them via Bluetooth settings.
5. Why won’t my AirPods connect to my laptop?
Make sure Bluetooth is enabled, your AirPods are charged, and they are in pairing mode. Restarting your laptop and resetting the AirPods may also help.
Also Read

